Congratulations, you’ve installed SmashPops! Now it’s time to set up your first campaign and create your first gamified pop-up. Here is a quick tutorial to guide you through those steps:
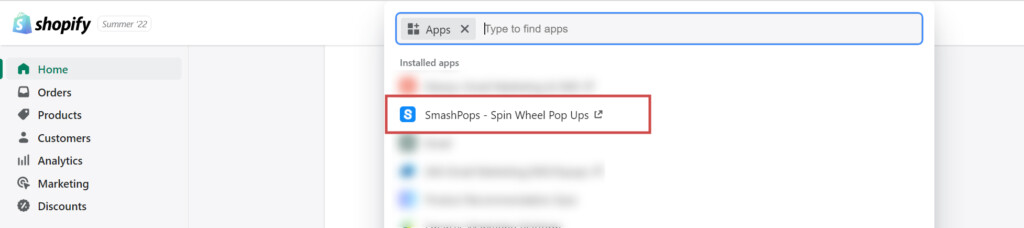
- First, open the SmashPops app from your Shopify admin.
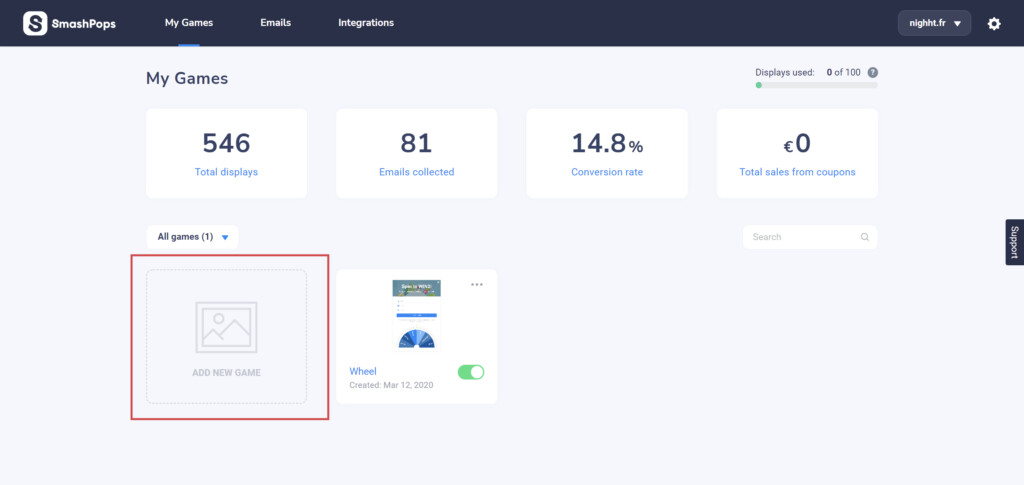
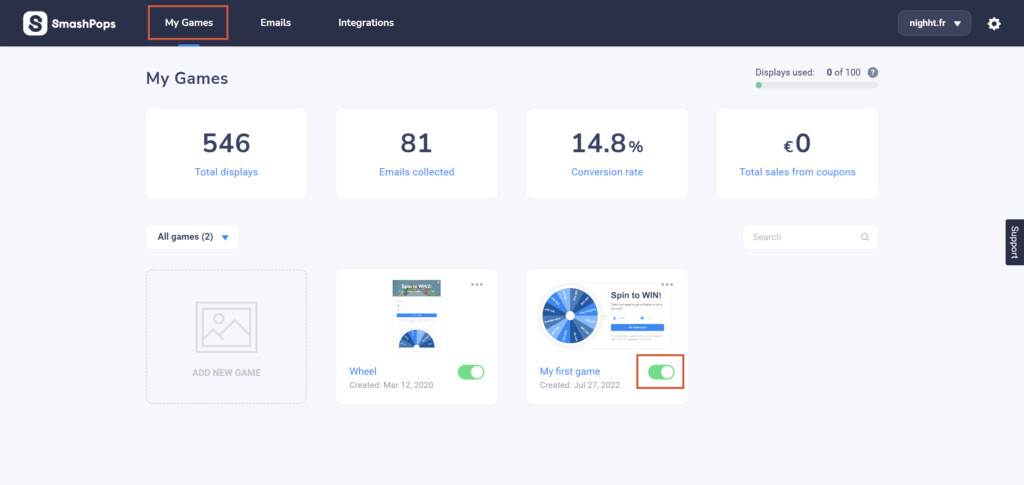
- Click on ADD NEW GAME
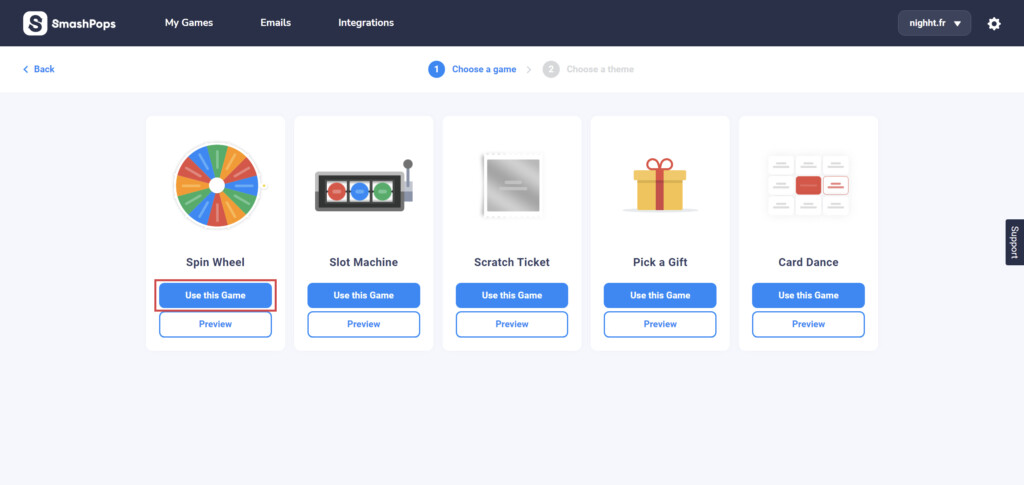
- Choose a game and click on Use this Game (you can preview how each game will look by clicking on Preview)
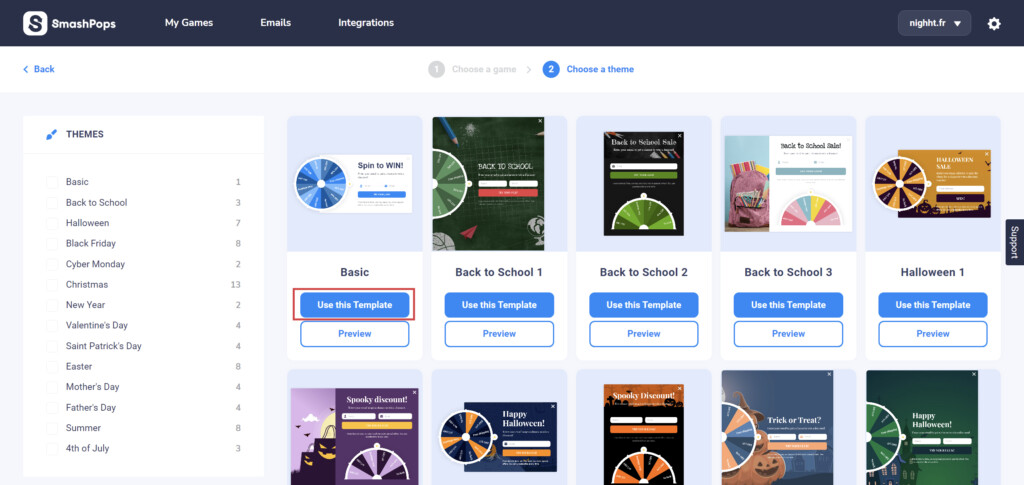
- Choose a theme and click on Use this template.
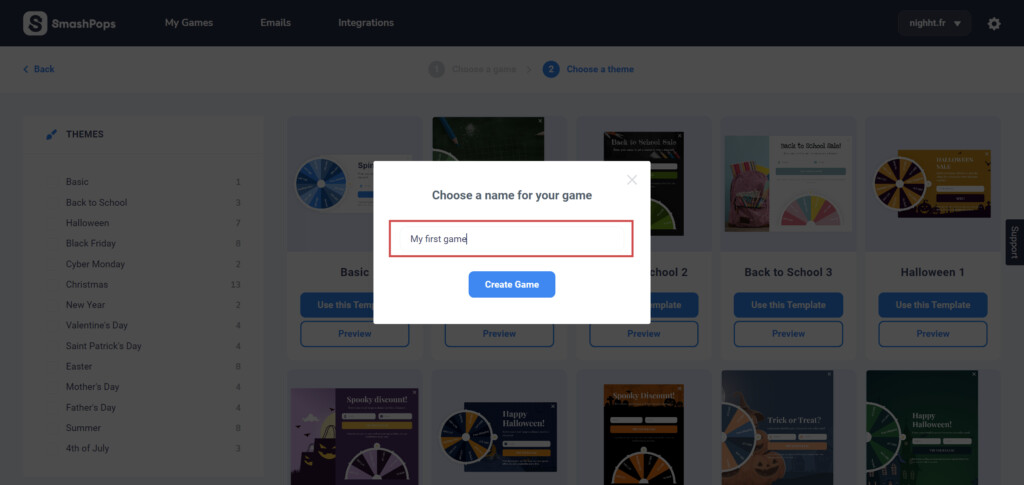
- Choose a name for your game and click on Create Game.
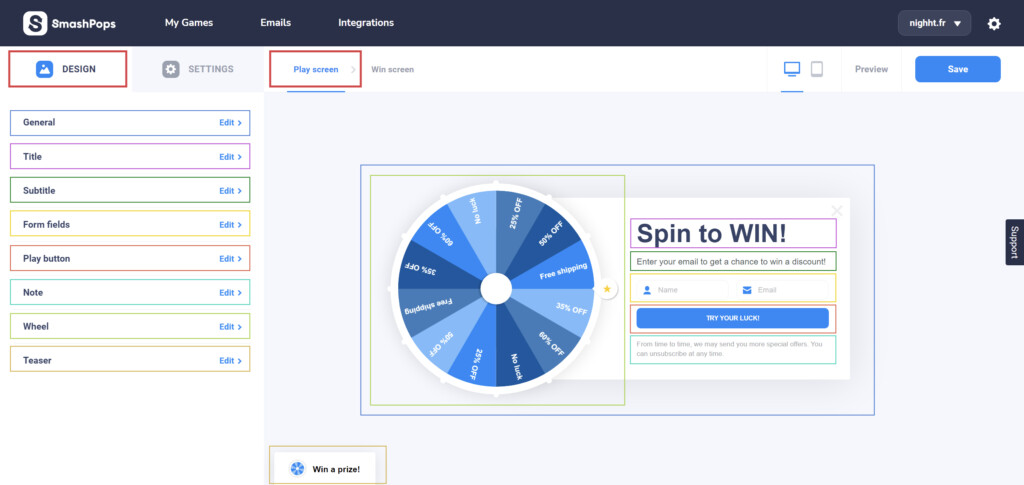
- You are now in the builder of your pop-up. In here, you’ll be able to edit the design, text, fields, behaviour and data processing of your game.First off, let’s have a look at the DESIGN tab.In this tab you can edit each element that composes your pop-up and change how your wheel looks on screen. In the screenshot below, you’ll see that every element on the Play screen is editable.
 In the design section, you can also edit your win screen by clicking on Win screen.This is the screen that will be displayed to the user once he has hit the play button. This is where you’ll share your discount coupon code with him.
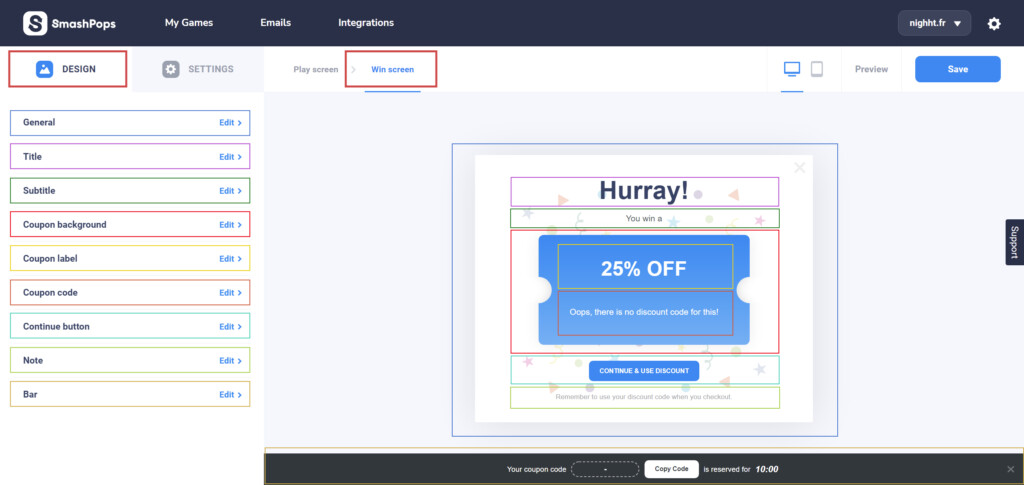
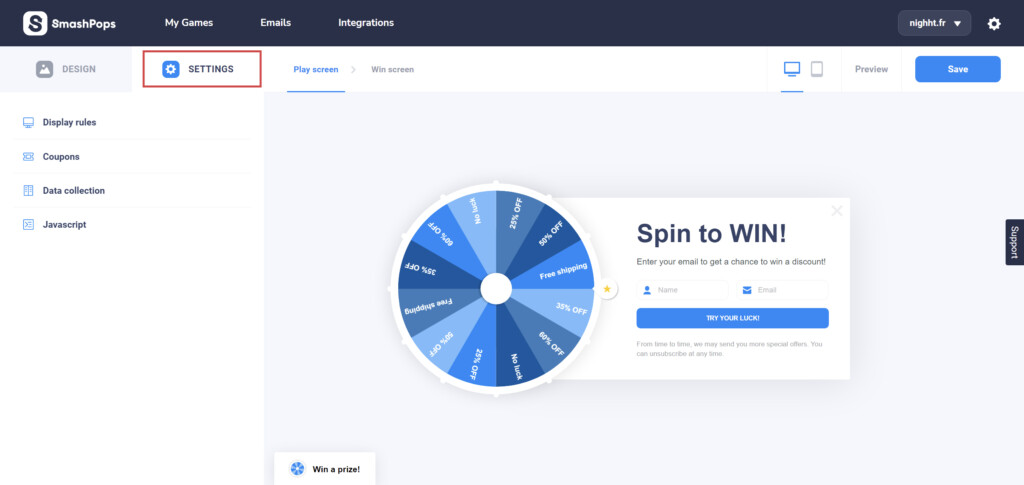
- Now, let’s head to the SETTINGS tab in which you can set up your coupons, display rules and data collection rules.
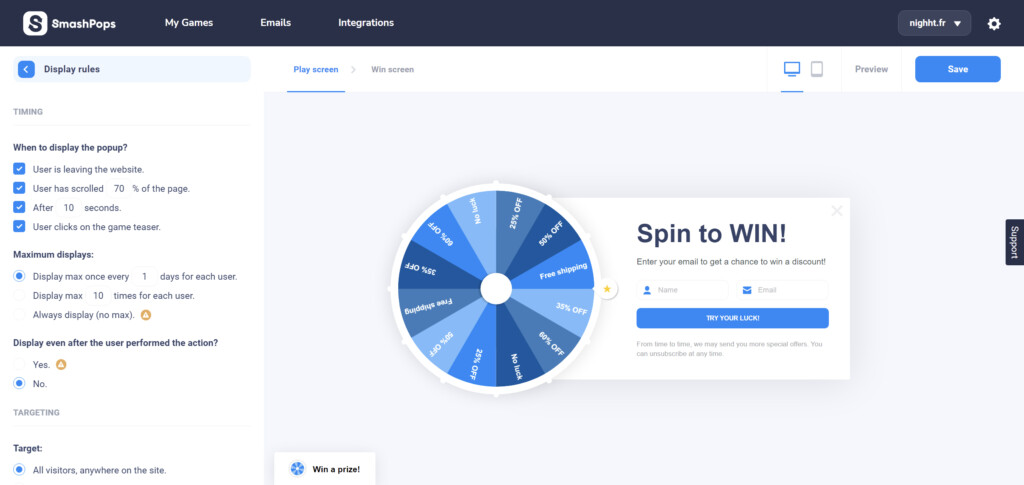
- In the Display rules section, you can under what conditions your popup should be displayed to your visitors.For example, you can decide the maximum displays per user, the time to wait before it shows up, etc.You can also adjust targeting options such as the country, the device or restrict the display to a specific page.
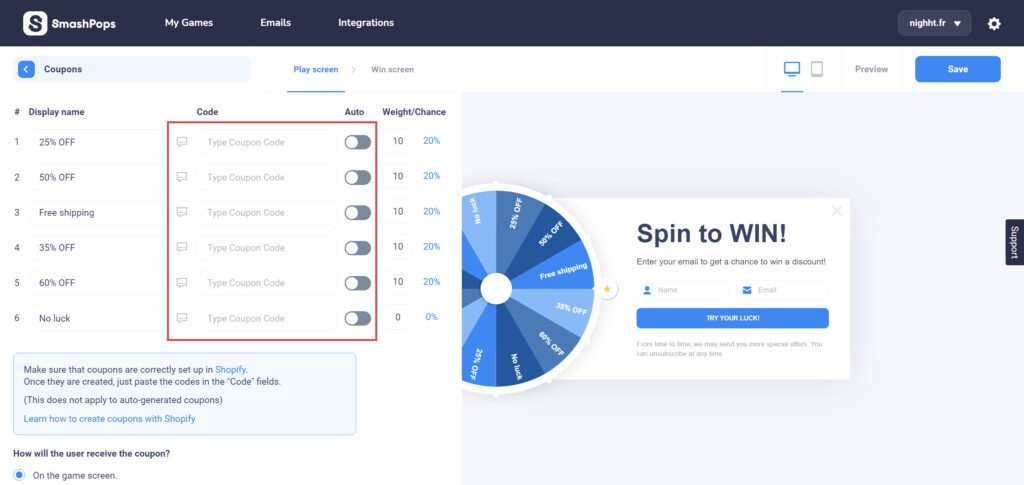
- Now let’s jump to the Coupons section. Here you can see that all the coupon codes fields are empty. You absolutely need to fill them in with codes generated in your Shopify admin (or let us auto-generate them), otherwise your customers won’t receive any coupon on the Win screen.Let’s do it! Note that there are 6 slots for your coupons, if you wonder how to reduce the number of slots/coupons in your wheel, check out this link.
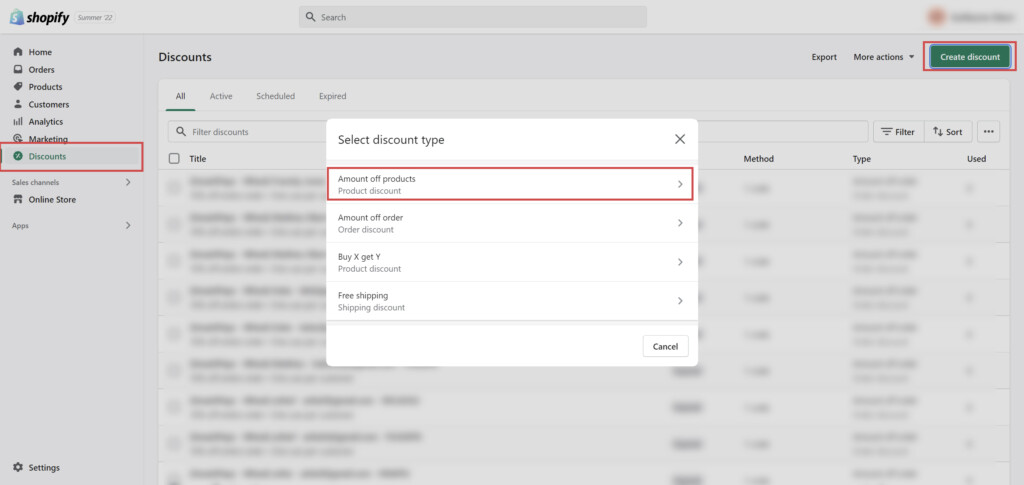
Let’s create our first coupon. First, you can change the Display name as you want. Here we’ll keep “25% OFF”. Let’s create the coupon in Shopify and copy the code in this first field.To do so, click on Discount in your Shopify admin, select Amount off products and then Create discount.
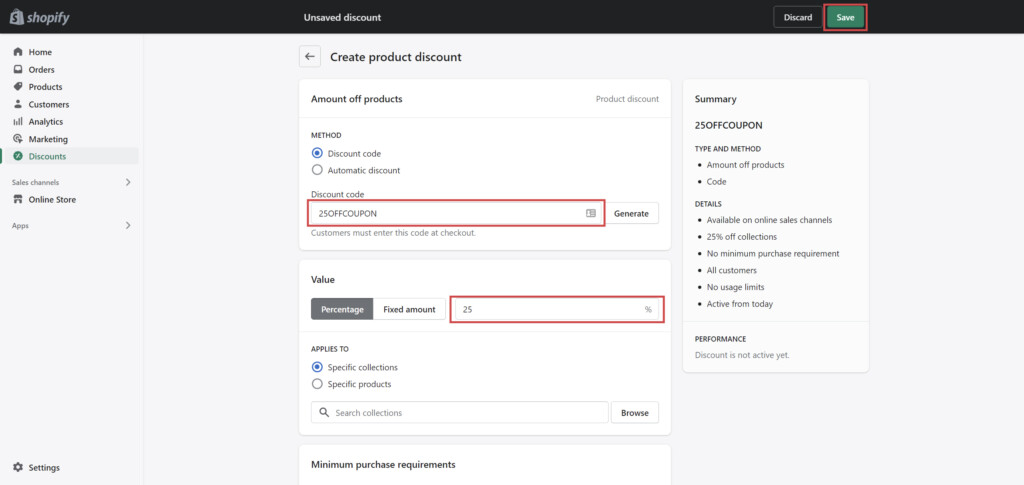
 Next, chose your Discount code for example 25OFFCOUPON, and put the corresponding percentage discount in the Value field (in our example we want 25% off). Click on Save to activate your coupon code.
Now, let’s head back to SmashPops and copy and paste your discount code into the first field. Repeat the operation for all the remaining fields. If you want a losing coupon like the No luck “prize”, leave the code field empty (but we don’t recommend making your customers lose).Next thing to set up in this section is the probability of winning each coupon when the wheel spins. This is the Weight/Chance column. You can change this probability by changing numbers in all the fields. On the right, in blue, you can check the probability in %.
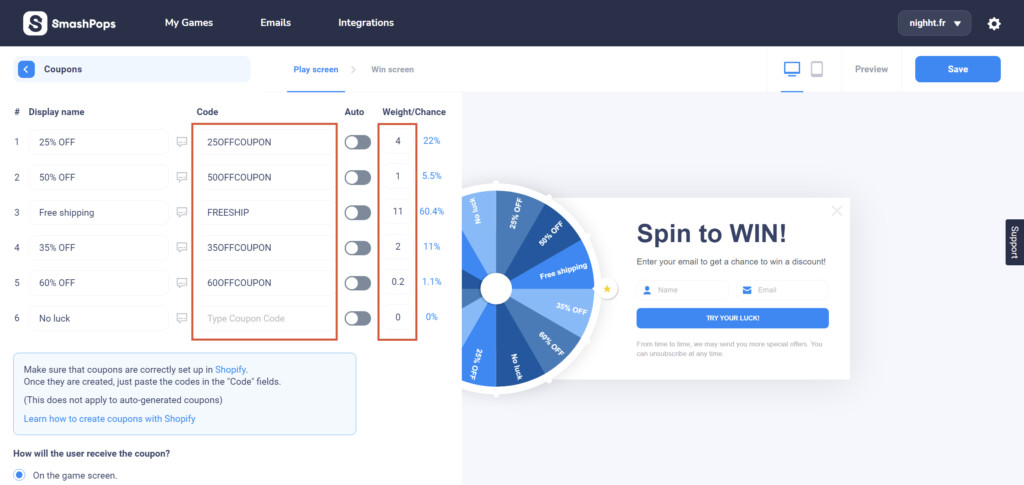
We also offer the option to automatically generate coupons for one-time use codes. - Data collection is the next section. Here we are setting up what to do with the data you collect. By default, the data is sent to 2 places: to the SmashPops list and to your Shopify customer list.
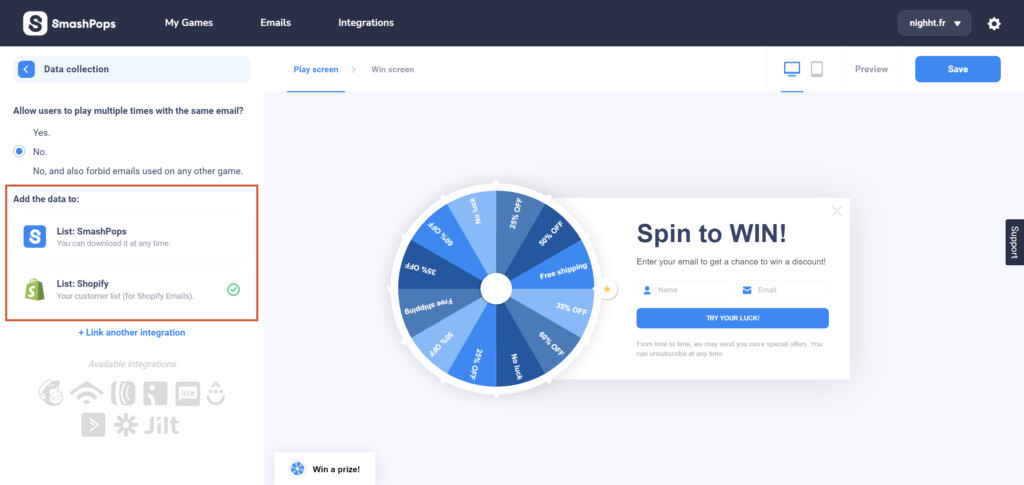
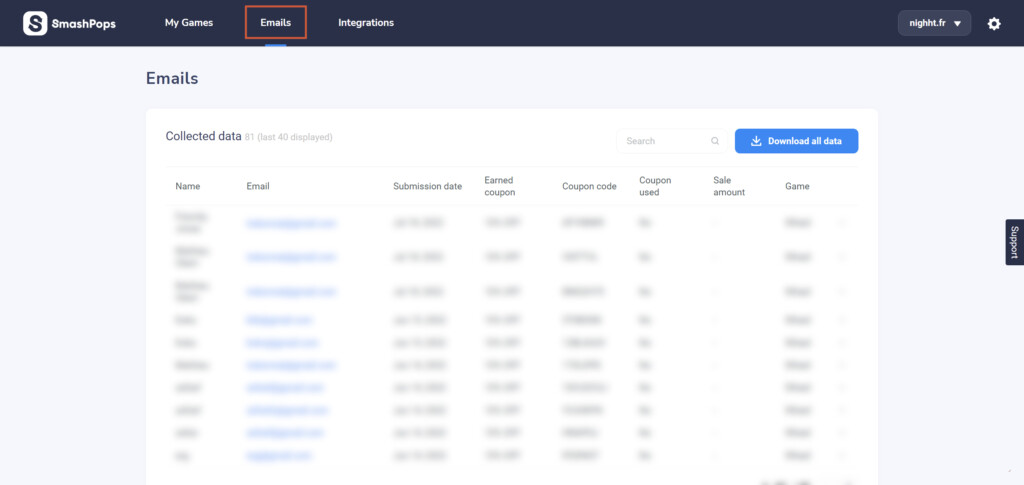
You can access the SmashPops list by clicking on Emails in the top bar menu. As you can see, in this section you’ll find all the data collected by all your games. You can download your data in a .csv file whenever you want by clicking on Download all data.
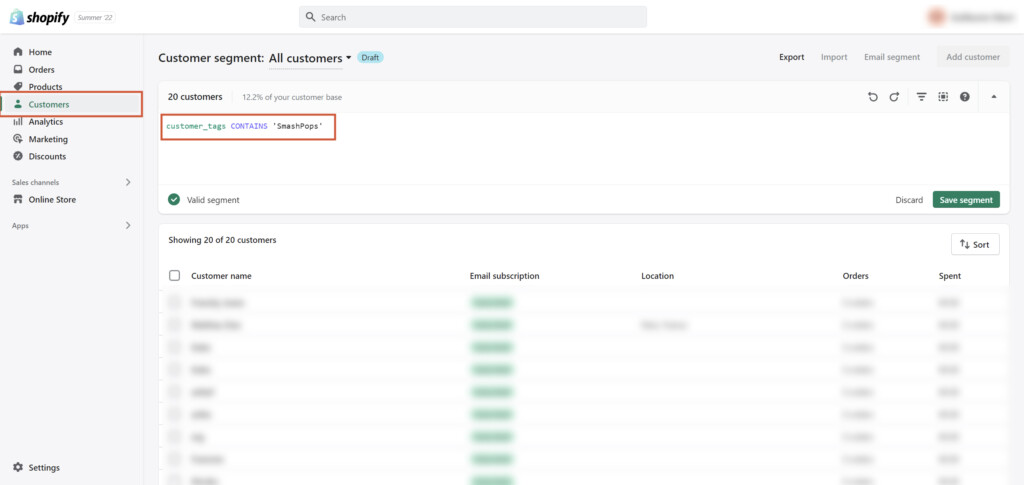
 In addition, all your collected data is also sent to your Shopify customer list with the tag ‘SmashPops’ (which means that you can view it simply by going to https://YOURSHOPNAME.myshopify.com/admin/customers?segment_query=customer_tags%20CONTAINS%20%27SmashPops%27%20 )
 Of course, if you want, you can link SmashPops to other third-party email providers. We support a lot of them like Klaviyo, MailChimp, Omnisend and more! Finally, the Javascript section will allow you or your developer team to call a Javascript function at the start, middle or end of the game.
 - Everything is set up, let’s click on Save and make our first campaign live! Go back to My Game, and click on the toggle button to either activate or deactivate your pop-up. Make sure it’s green. Congratulations, your first pop-up is now running on your website!
Feel free to have a look at how to test if my pop-up works, how to schedule a campaign, what happens when you reset cookies or how displays count work.