We’ll walk you through the steps to send the coupon code via email using your MailChimp account (you’ll need to have a MailChimp paying plan to use a customer journey, as it’s not available on their free plan as of today).
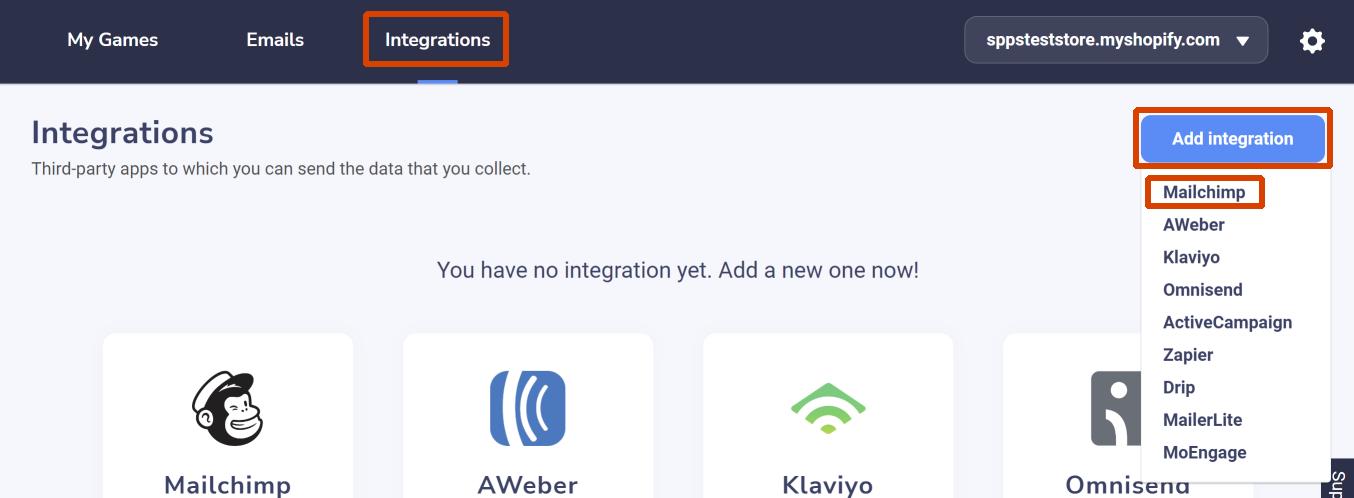
1. If not already done, add your MailChimp integration to SmashPops. To do this, go to “Integrations” and click on “MailChimp”.
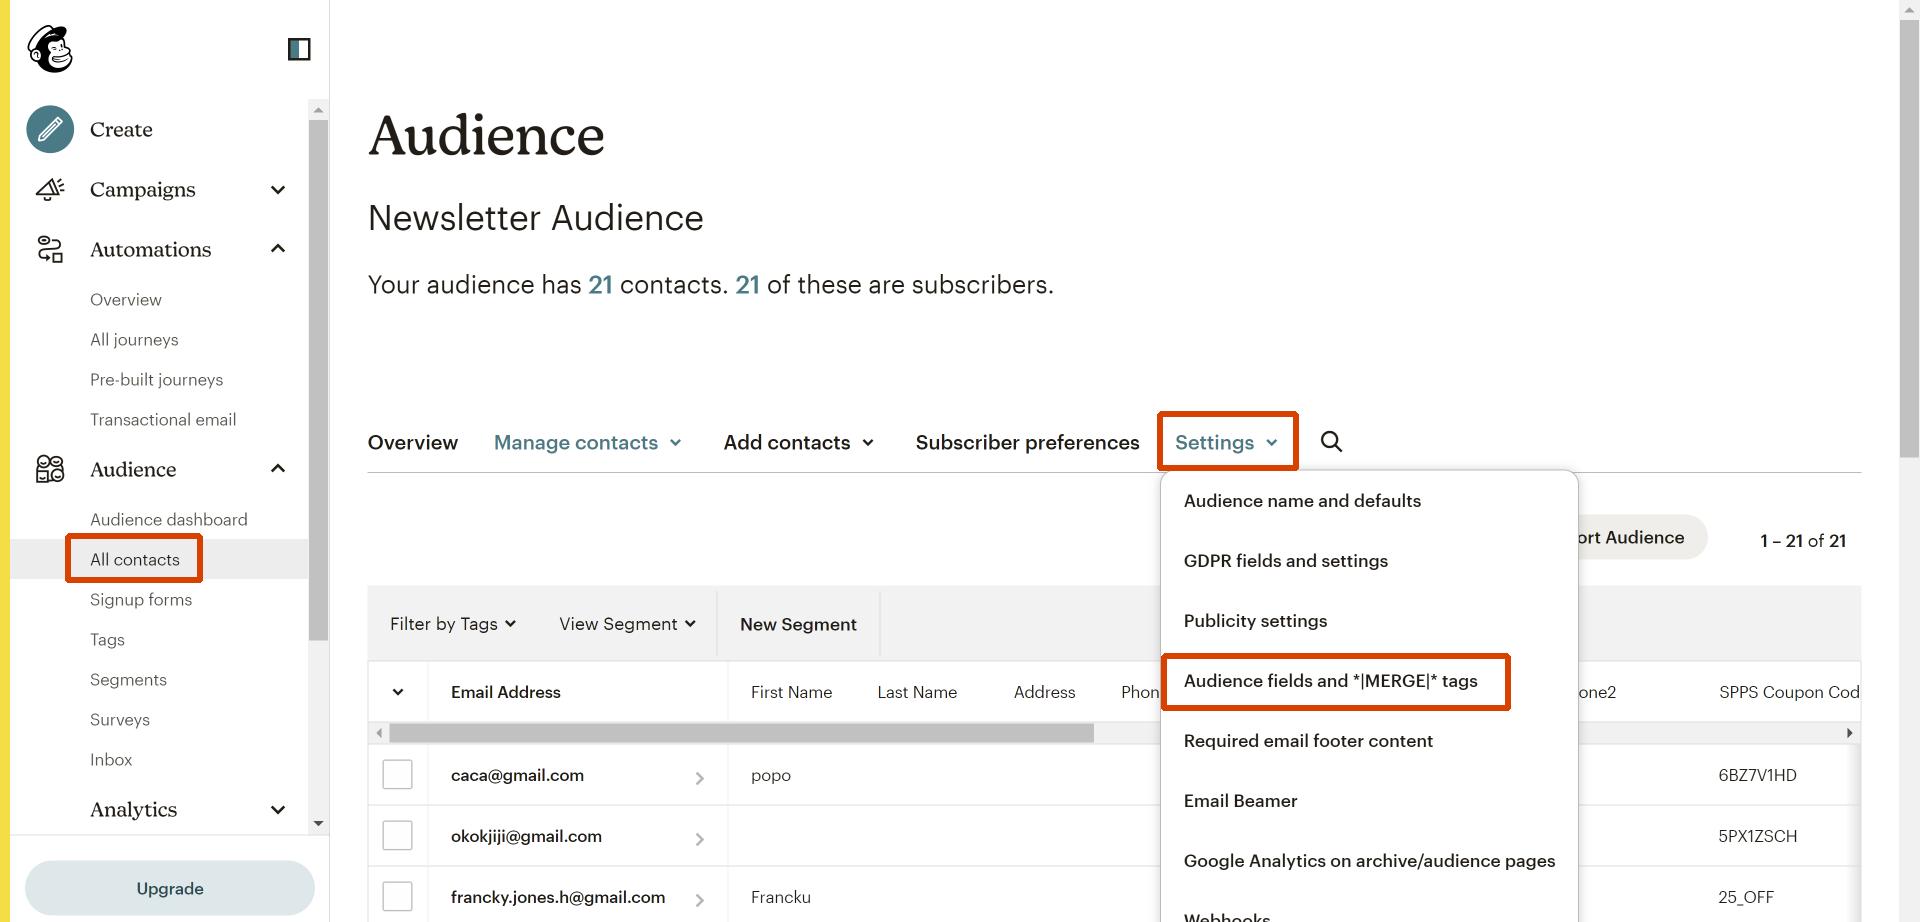
2. Make sure you have custom fields in your MailChimp audience to map to the coupon code, coupon name (to use in the email we’ll send) and game name (to trigger the flow, although it would work with the game id too).
If you don’t, go to “All contacts > Settings > Audience fields and *|MERGE|* tags”.
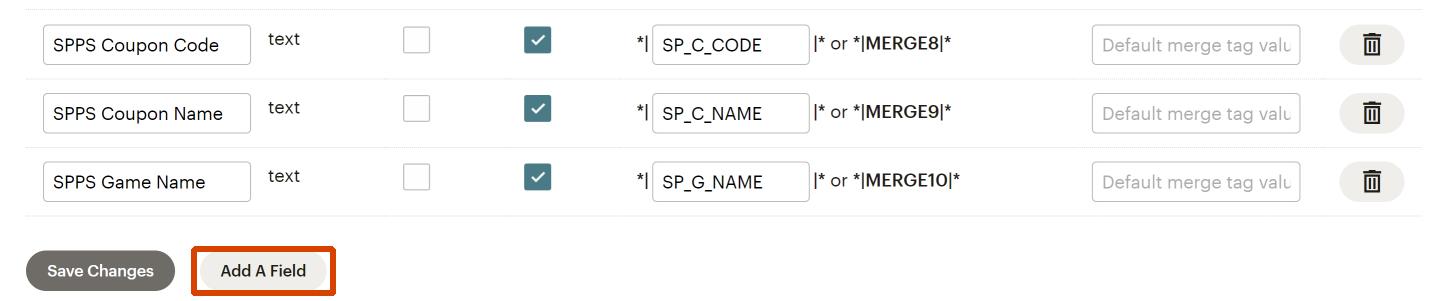
Then at the very bottom, click on “Add A Field” and add 3 text fields : “SPPS Coupon Code”, “SPPS Coupon Name” and “SPPS Game Name”. You may want to set the merge tags to something a bit more explicit than MERGE8, but it’s completely optional (I have set them to “SP_C_CODE”, “SP_C_NAME” and “SP_G_NAME” in the screenshot below). Once it’s done, click on “Save Changes”.
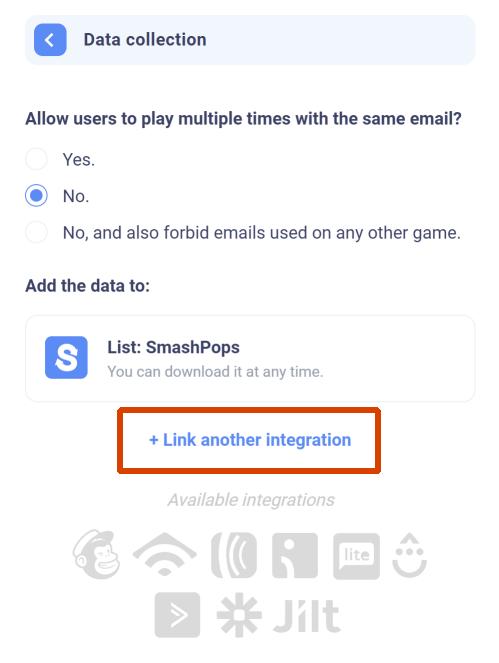
3. Now let’s tell SmashPops to fill those fields when someone plays. To do this, edit a popup, go to “Settings > Data collection”, click on “+ Link another integration” and select your MailChimp account.
From there, select the list to send the data to (“Newsletter Audience” in the example below), then click on “Advanced fields bindings” and bind the “Coupon code”, “Coupon name” and “Game name” to the fields we created earlier.
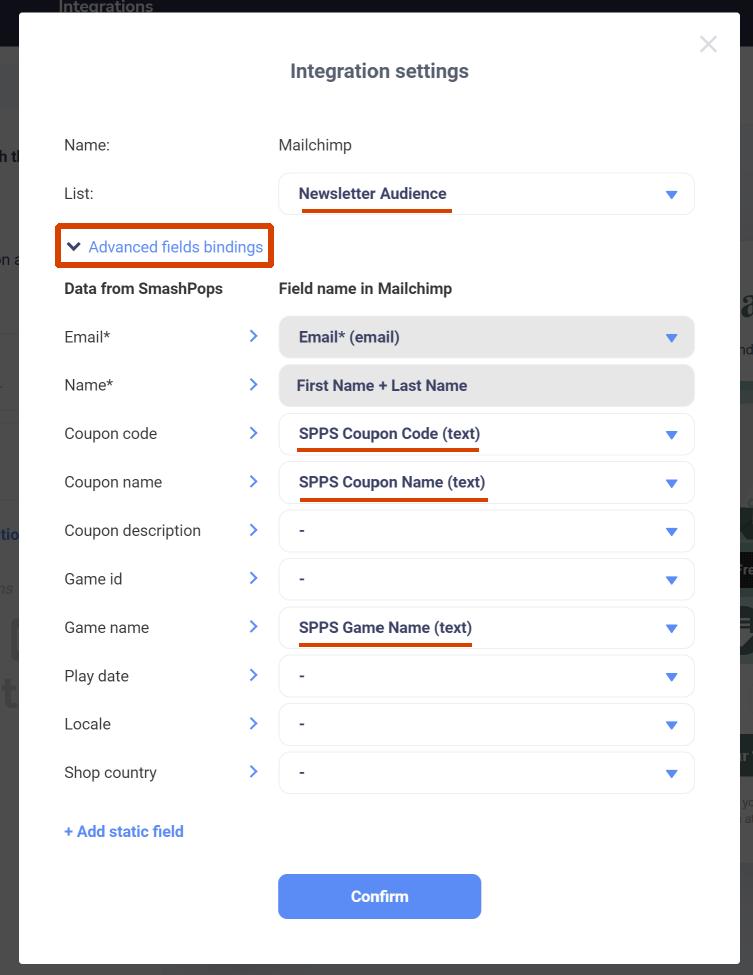
Hit “Confirm” and “Save” to save your changes.
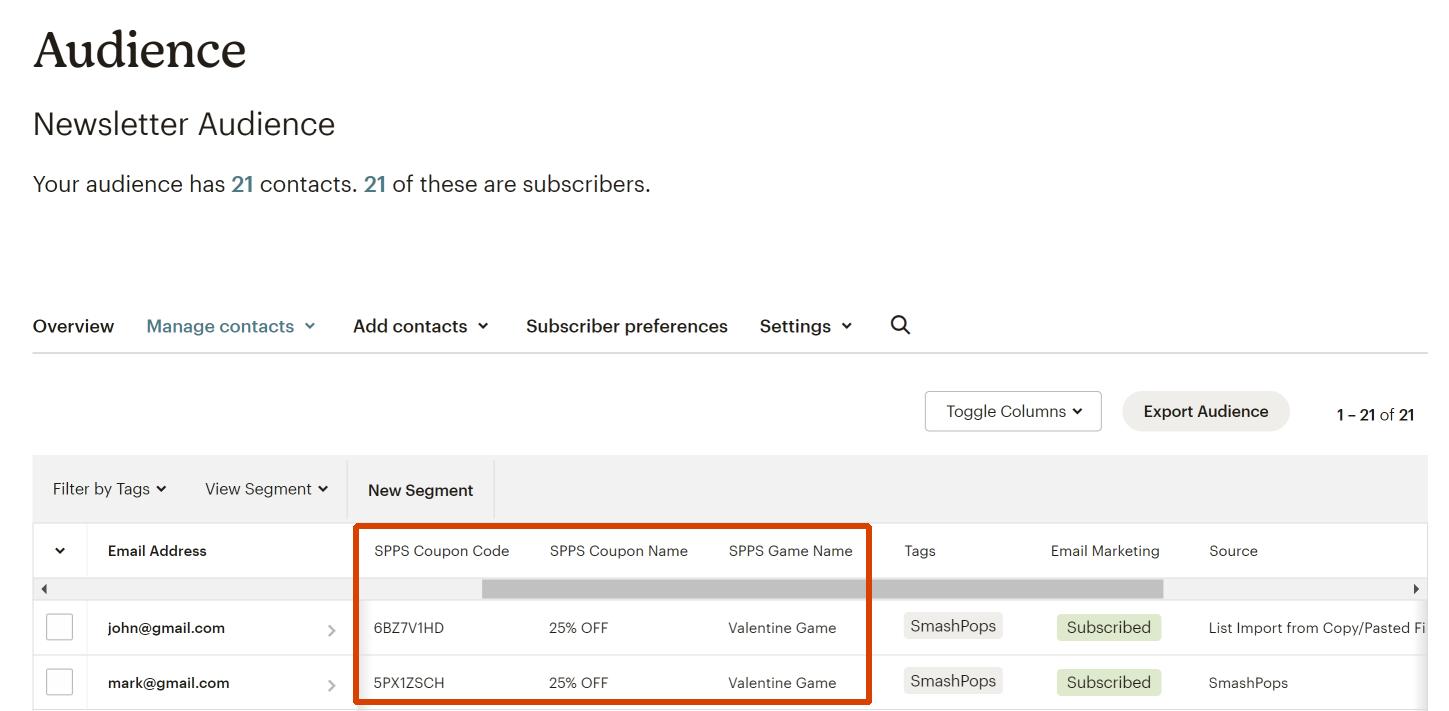
From now on, every time someone plays on your popup, we will send the appropriate data to MailChimp (cf screenshot below). You can also notice that we add a tag “SmashPops” to the contact and there is also a “Source” field whose value is “SmashPops” when the contact has been created by us.
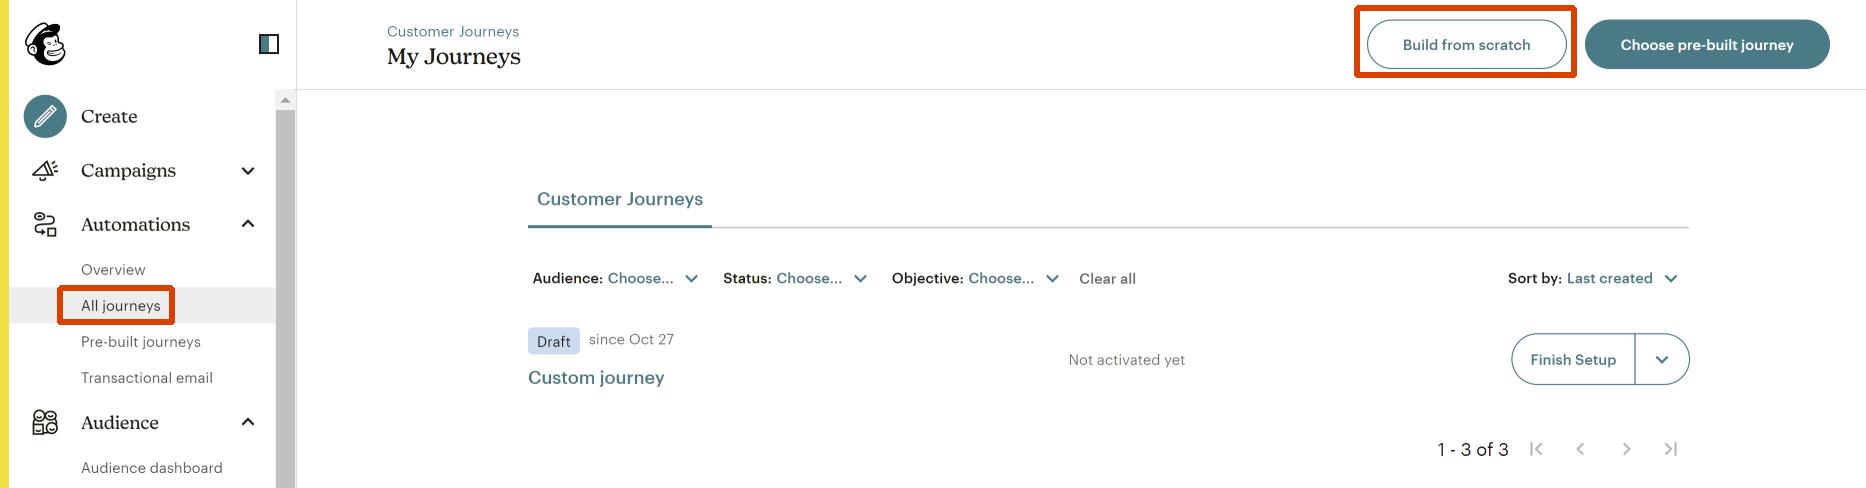
4. Now, let’s set up a customer journey (a flow) to send an email whenever someone plays.
In MailChimp, go to “Automations > All journey” and click on “Build from scratch”.
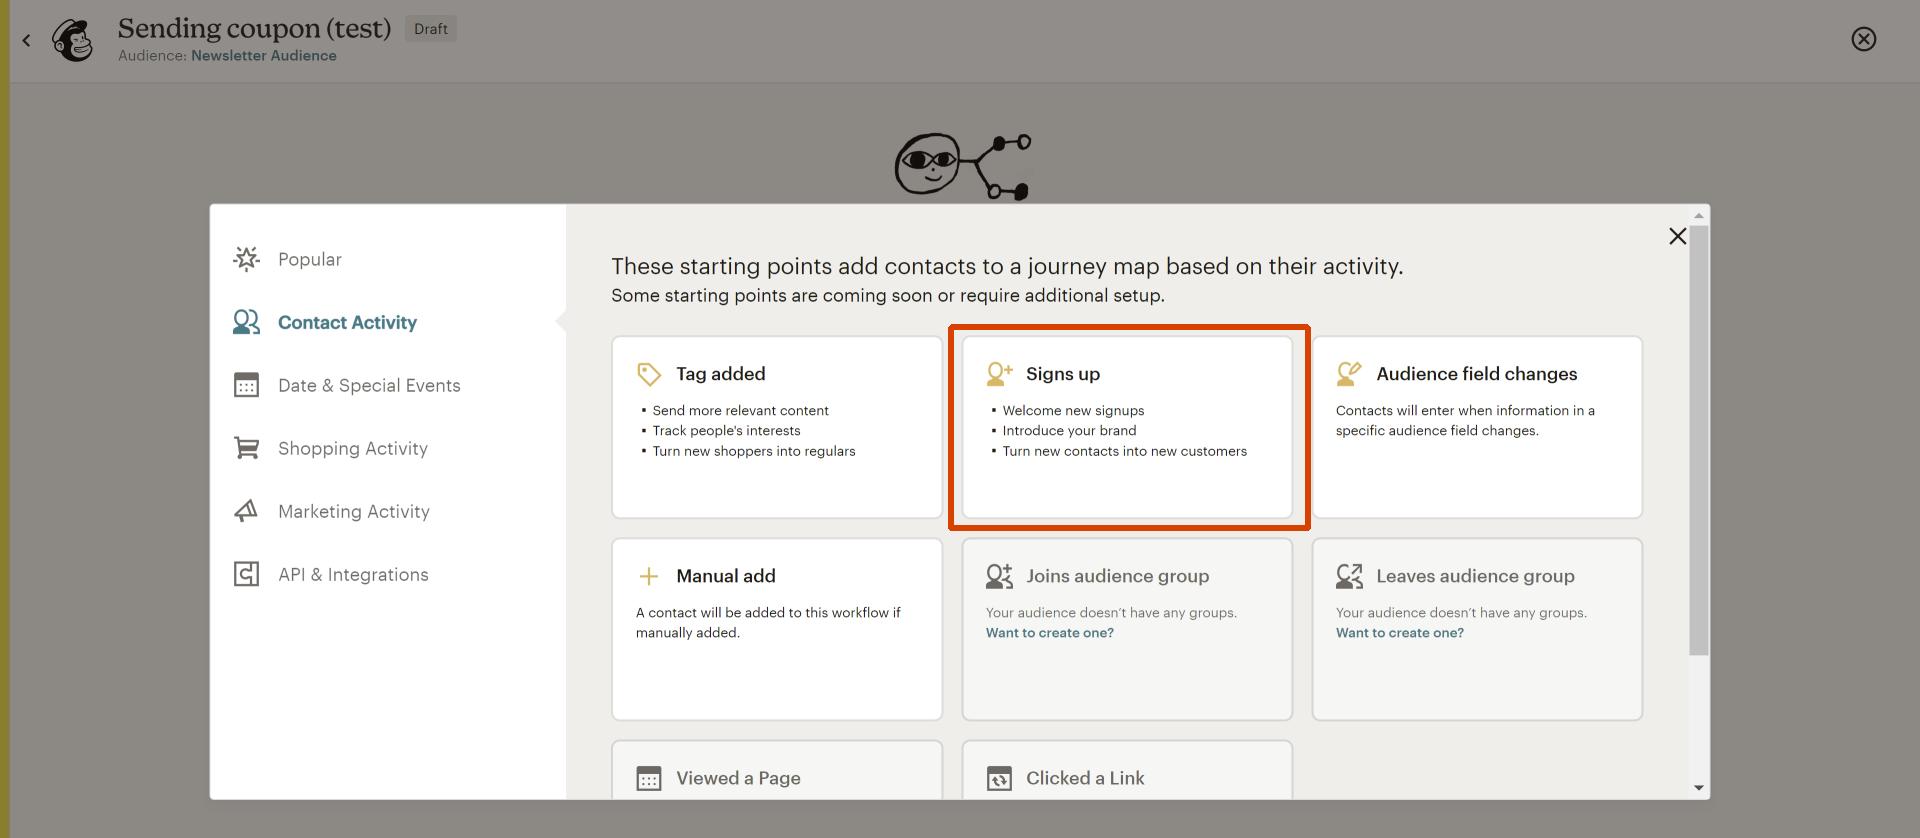
Give a name to your journey, and select the “Signs up” starting point (in “Contact Activity”) :
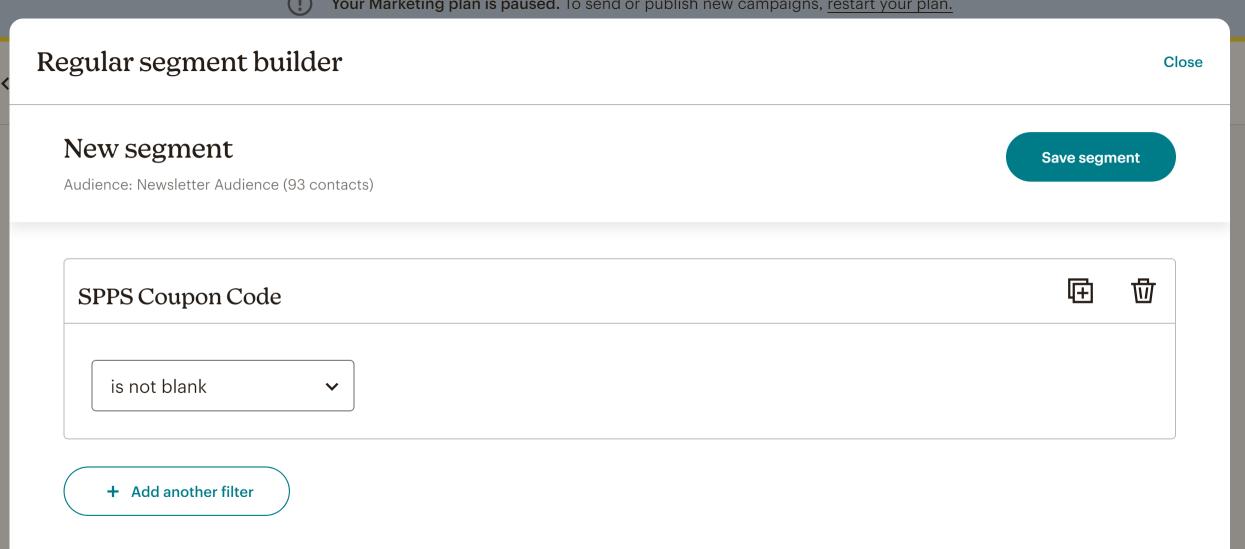
Click on “Filter who can enter this journey”, then select “+ Add another filter” and and set it up to match all the following conditions (cf screenshot below) :
– Select “SPPS Game Name” and set the field value to the name of your game (again, this could also work with the Game ID which is less prone to changes or even with an arbitrary static field that you have set).
– Select “SPPS Coupon Code” and set it to “is not blank”, which is useful if you have losing coupons (i.e. who have no code, so for which there is no need to send an email).
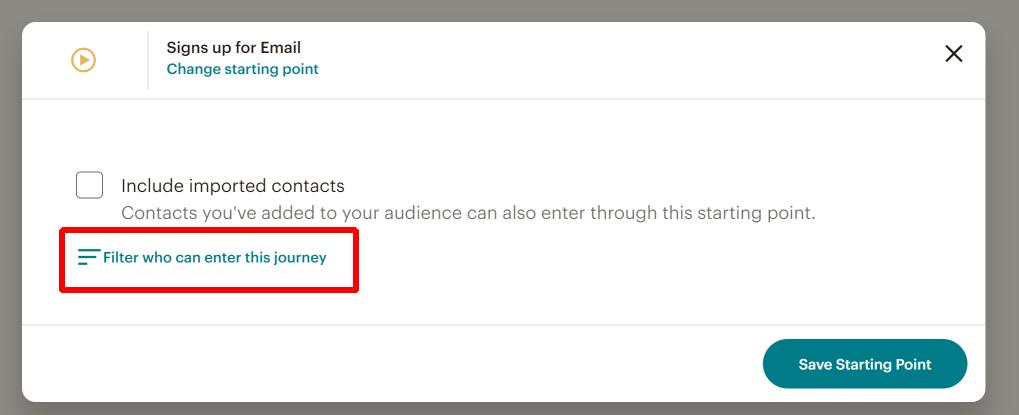
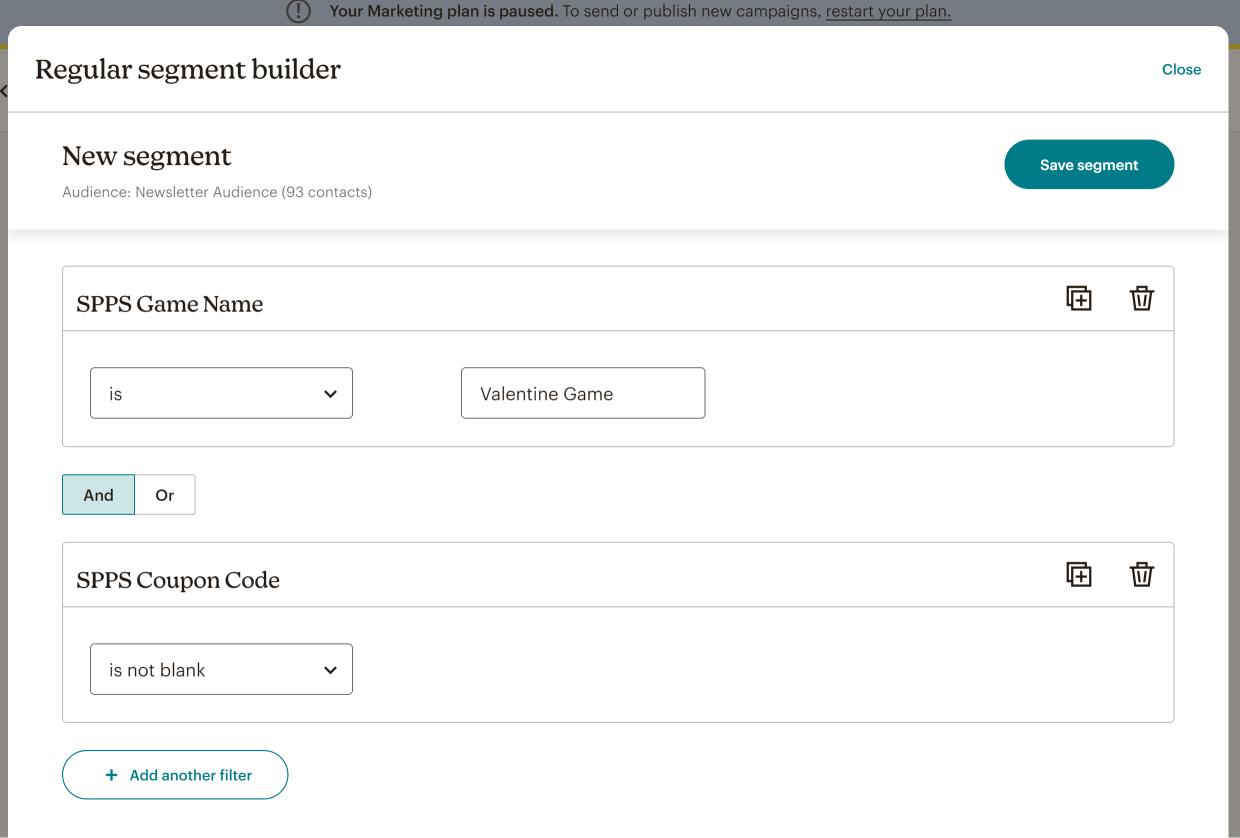
In my case, the name of my game is “Valentine Game”.
Click on “Save Starting Point”.
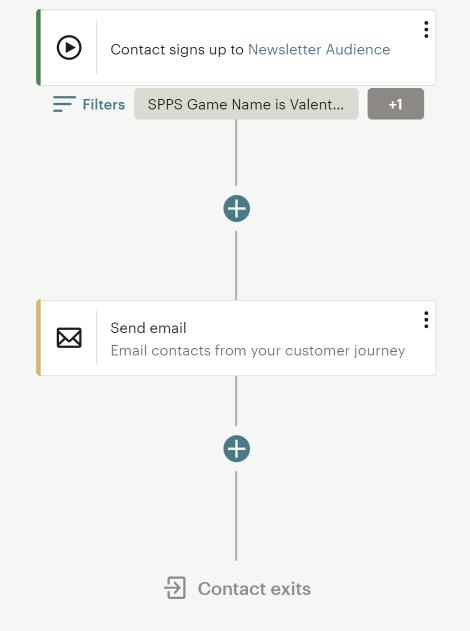
Now click on “Add a journey point” and click on “Send email”.
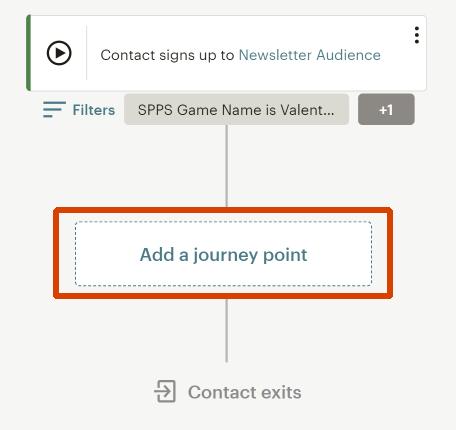
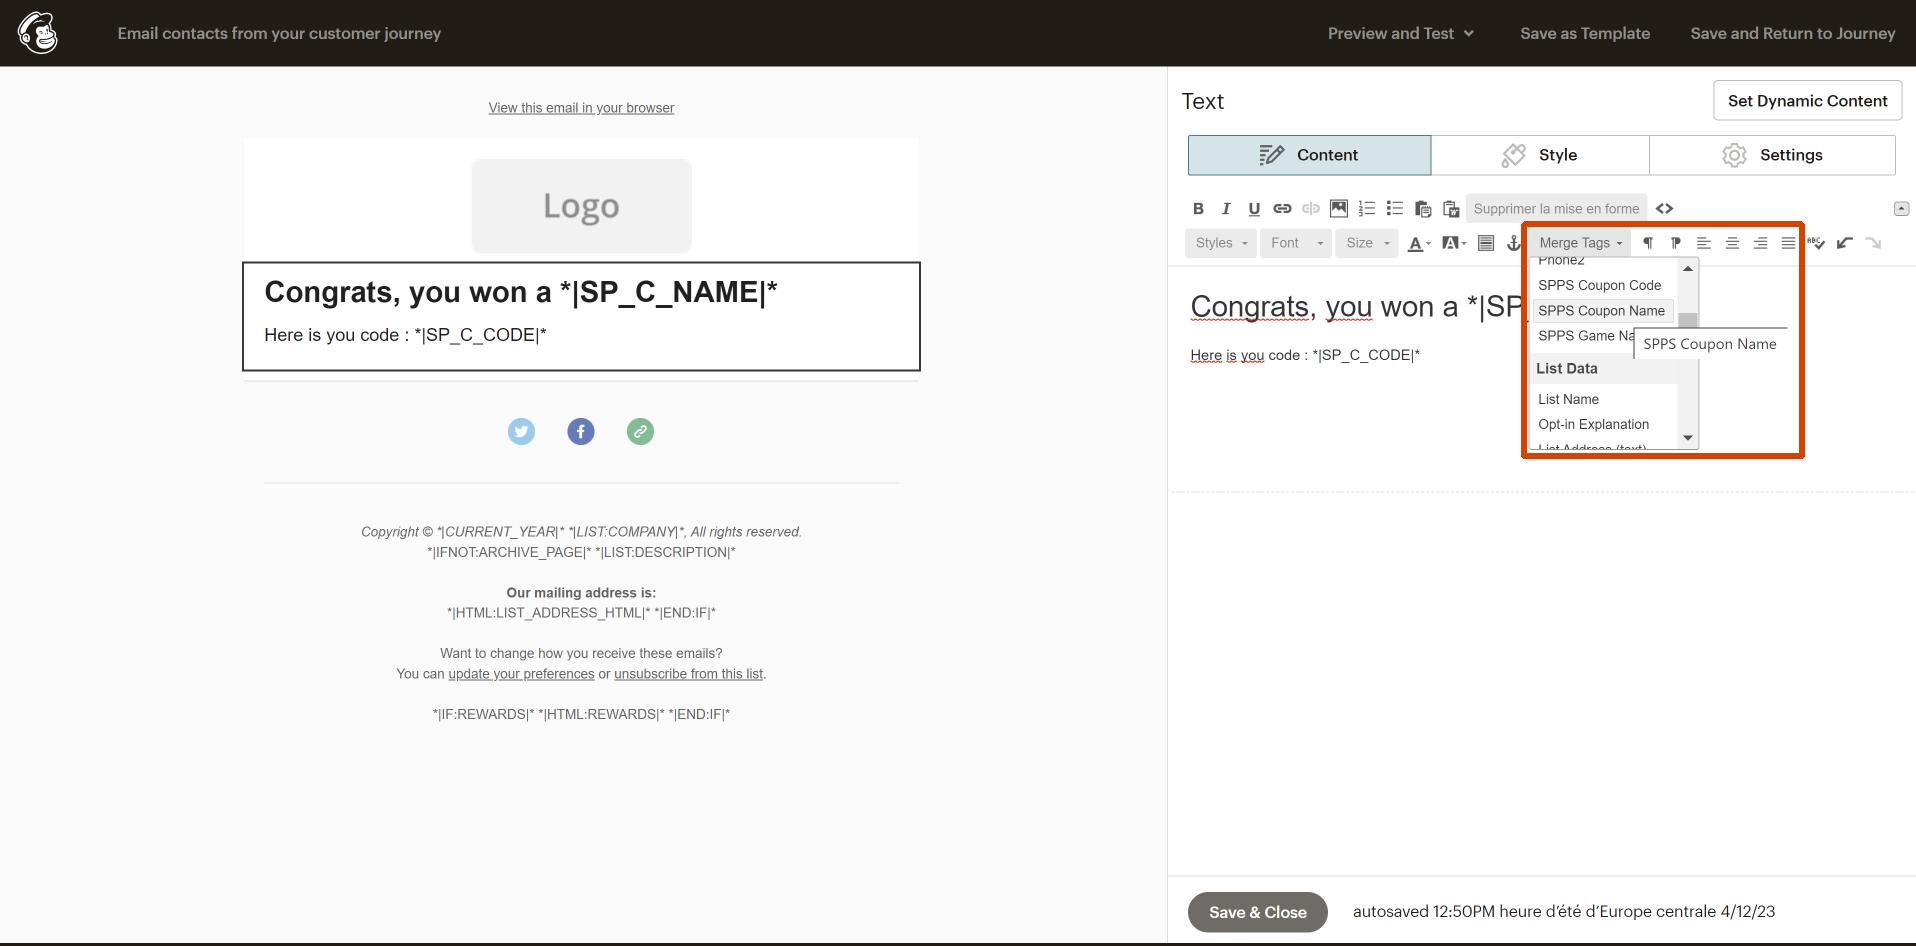
Edit the email you’ll send and add the coupon code and coupon name wherever you want in the email using the “Merge Tags” dropdown.
Save the email. The journey should look like this :
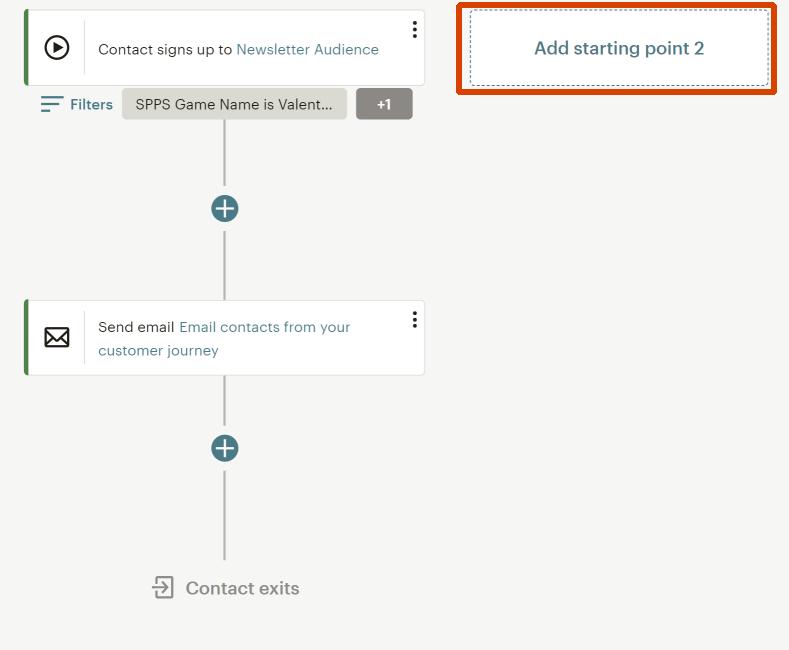
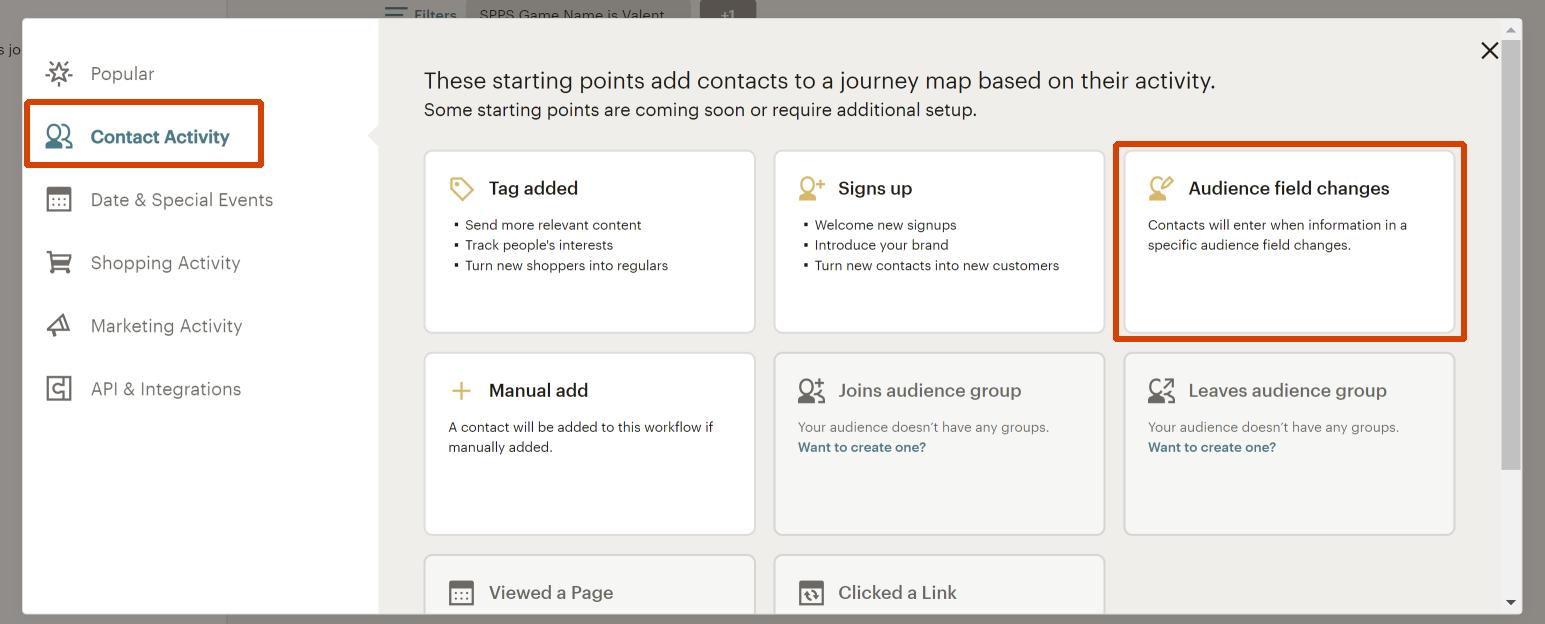
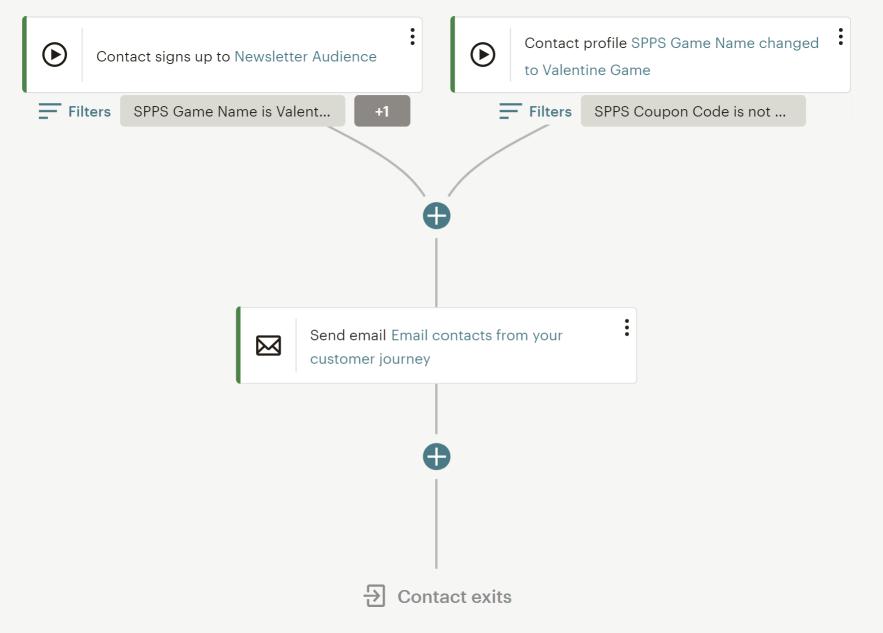
Now, you may have noticed that the starting point will target new contacts added to the audience. We also want to target the people who are already in the audience (so that they can receive the email if they play too). To do this, click on “Add starting point 2”.
Select “Audience field changes” under “Contact Activity”.
Enter “SPPS Game Name” under “Audience field” and then enter the name of your game (like before) under “What should the new field value be?”.
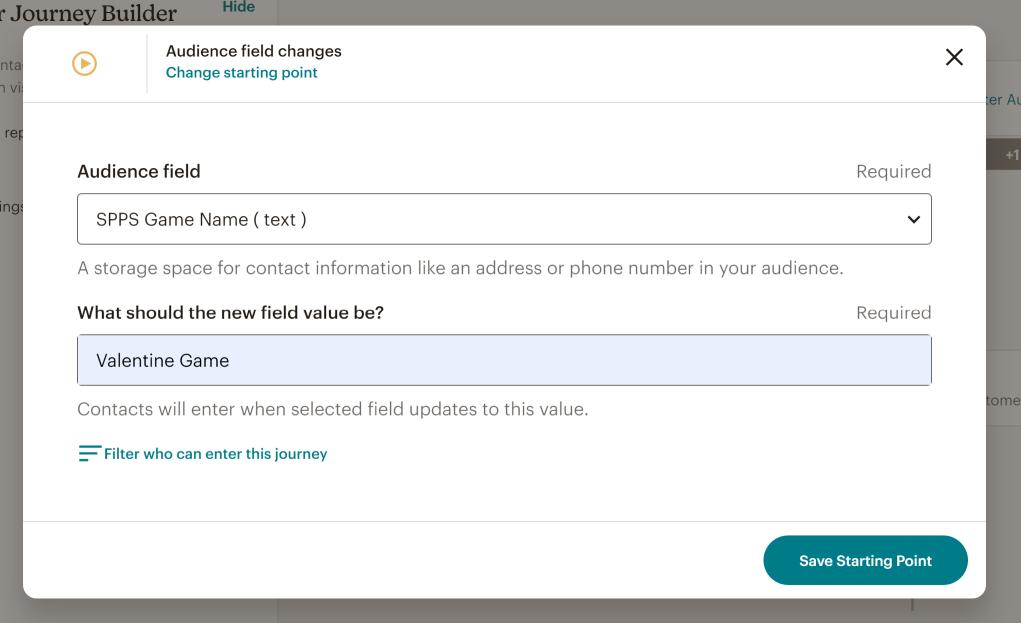
You can also click on “Filter who can enter this journey” and add a “SPPS Coupon Code is not blank” filter.
Once you save the starting point, the final journey will look like this :
Save the journey and activate it. If you need more information about customer journeys, you can refer to MailChimp’s documentation.
5. That should do the trick, now every time someone plays on one of your SmashPops popups, he/she should receive an email with the coupon code in it.
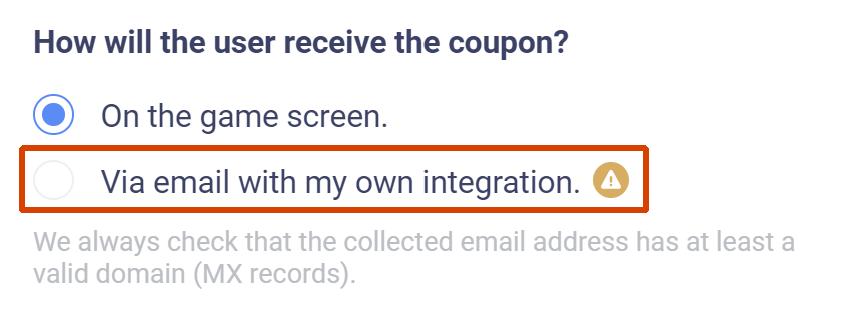
One last thing. By default, the coupon code will still be shown on the game screen.
If you only want to send it via email and NOT show it on the game screen, go to “Settings > Coupons” and select “How will the user receive the coupon? > Via email with my own integration”.
And of course, if you have any questions, you can still reach us at [email protected] .
Bonus : set up an email reminder.
You could modify your customer journey to have an email reminder if the customer hasn’t made a purchase.
To do this, you can :
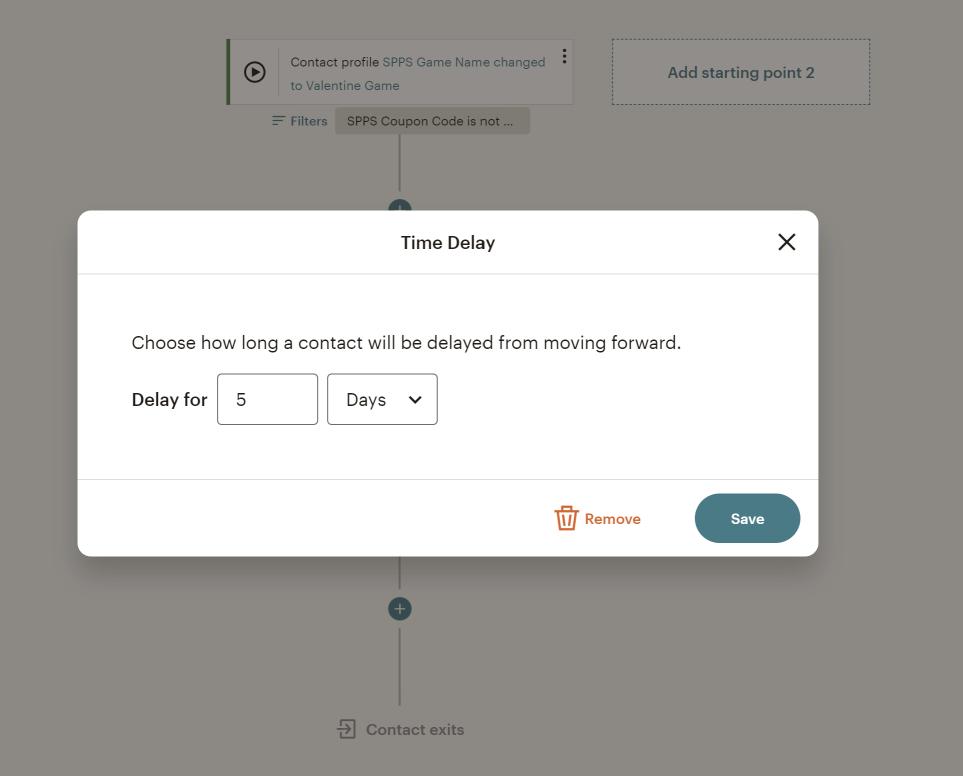
1. Add a “Time delay” journey point to your journey that will be a bit less than the validity time of your coupon. So for instance, if have set up your coupon code to be valid for 6 days (the default is 2 days for auto-generated coupons in SmashPops), you could put a time delay of 5 days or less.
2. Then you can add an “If/Else” journey point and make the condition “Purchase date within the last 5 days” (or less, depending on what you have put in your time delay). To see this “purchase date” condition, you’ll need to have the MailChimp eCommerce extension installed (here it is for Shopify), otherwise you won’t have access to those eCommerce events.
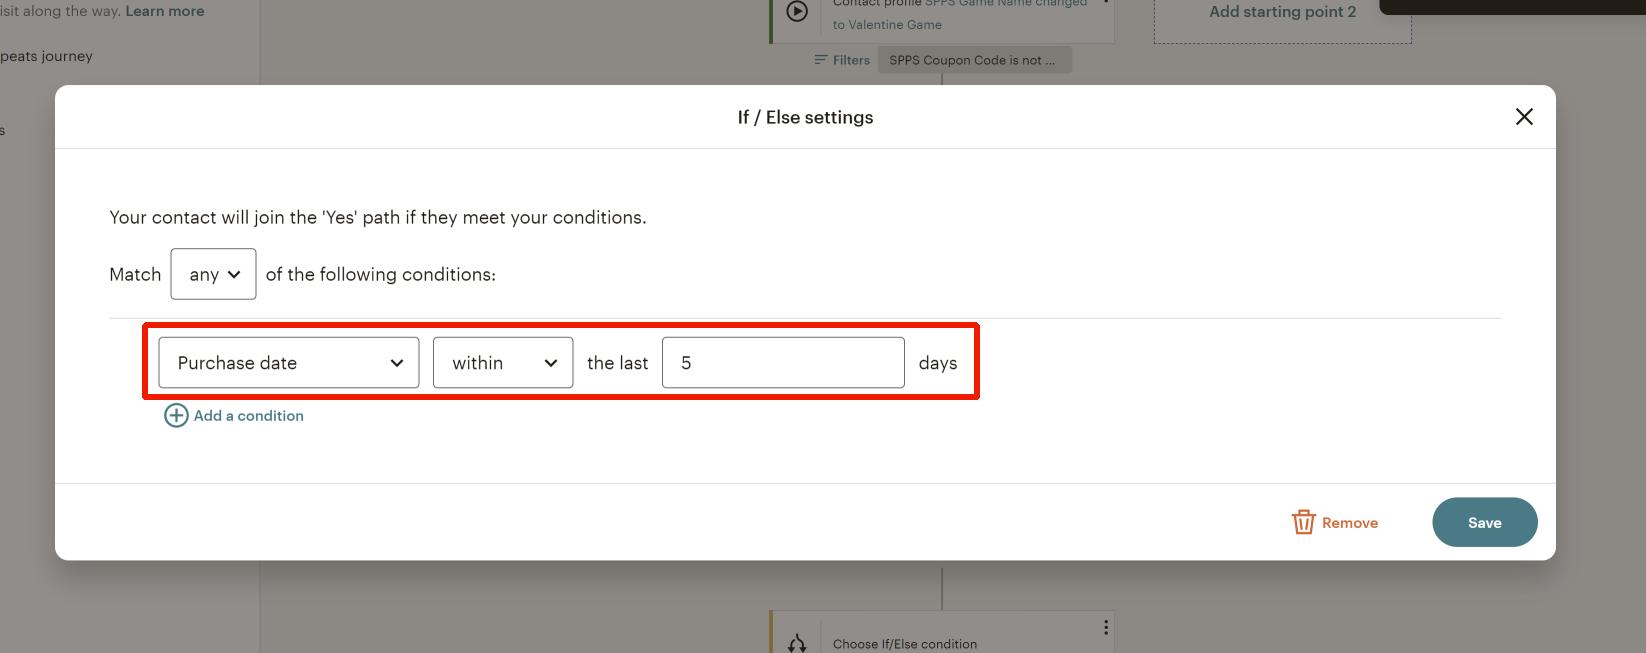
As you noticed, we are not checking whether the code has actually been used, but whether the customer made a purchase recently. This is not ideal as the customer may have made a purchase without using the code, but it’s the best we can do at this date (MailChimp won’t let you check for discount codes usage and unfortunately SmashPops doesn’t update the MailChimp profile if the code is used). Which is why it is recommended to use a conservative wording in the email we’ll set up in the next step.
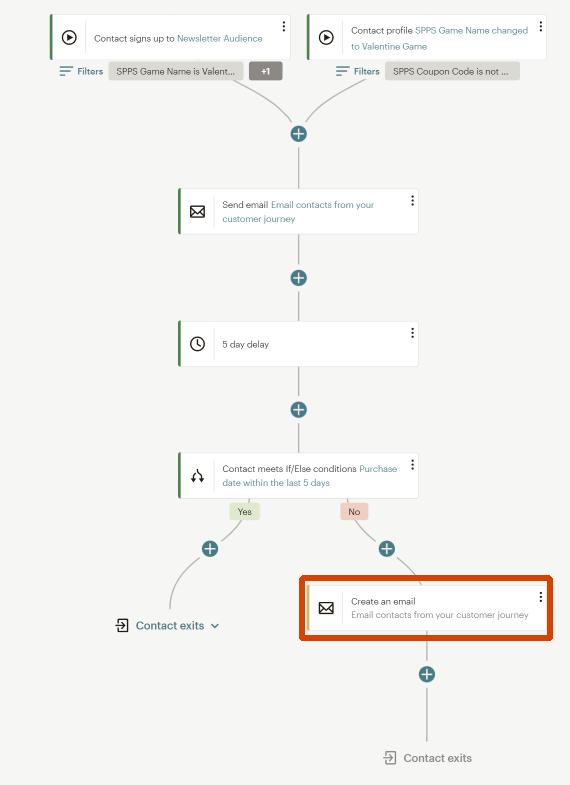
3. Add a “Send email” step in the “No” branch of the “If/Else” (which means that we’ll send the email if the customer has NOT made any purchase in the last 5 days). You can see the final journey on the screenshot below.
Fill the email body with the coupon name and coupon code like we did for the first email of the journey. Also, as we said earlier, it is recommended to use a wording like “Have you used your [coupon name] coupon yet?” in the email body instead of “Your [coupon name] has not been used!”.
And that’s it for the reminder email!