Since checking the full validity of an email address is a difficult task that some companies are actually dedicated to, you may want to connect SmashPops to those companies to validate the emails you collect. Here is how.
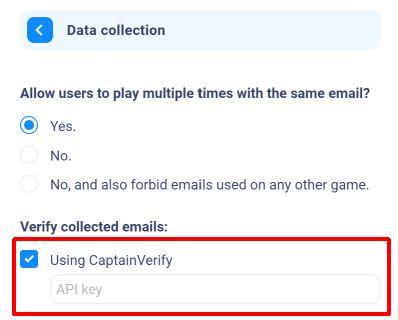
1. Go to “Settings > Data collection”.
2. Click on the service you’d like to use under “Verify collected emails” and paste the API key.
For CaptainVerify, you’ll find your API key in the API section (cf screenshot below).
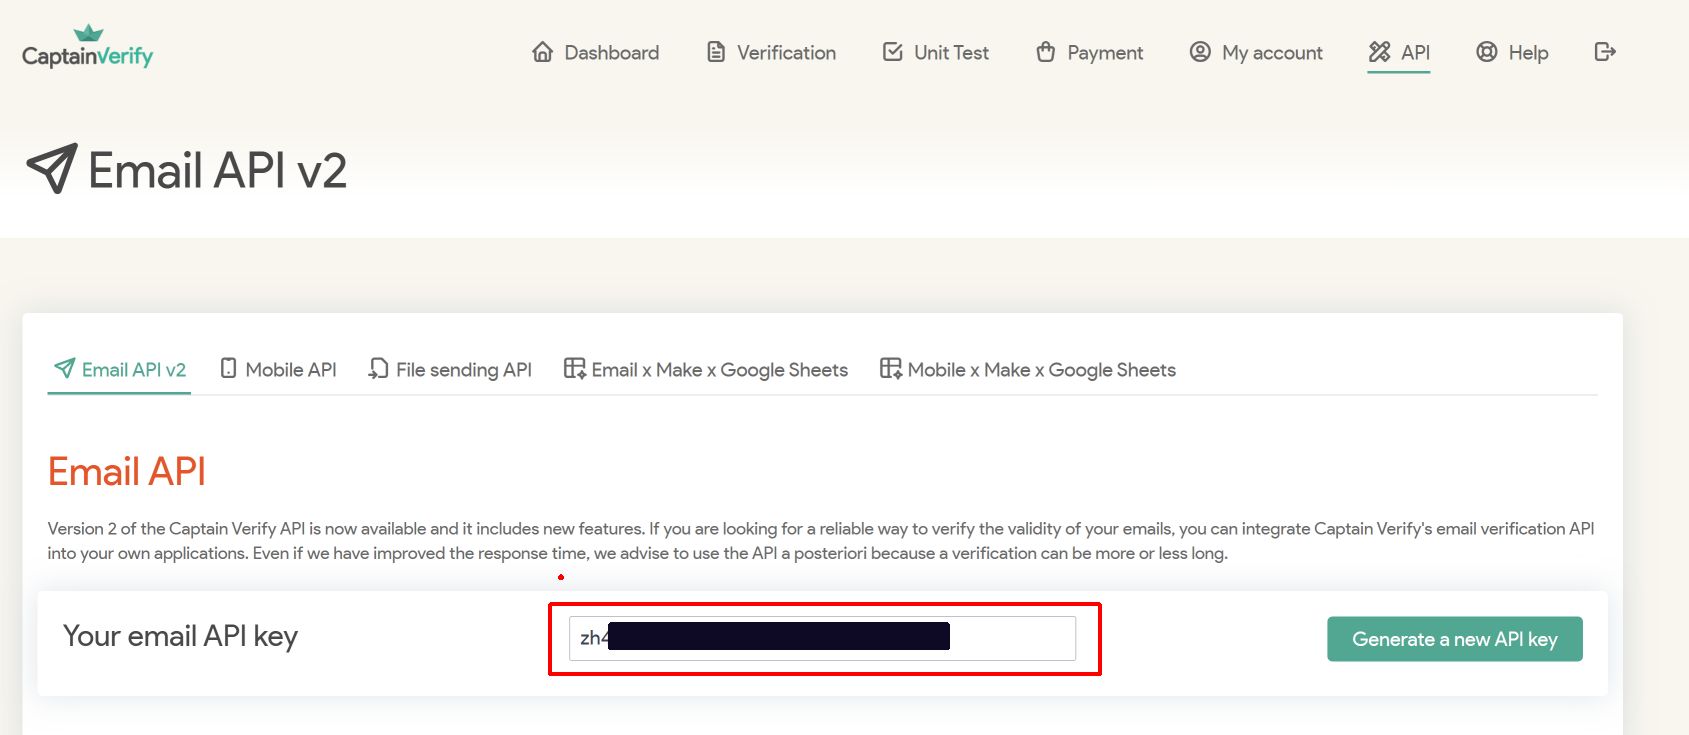
Once you’ve entered the key, save your popup.
From there, we’ll check every email your popup collects (right after our usual checks like MX record, banned temporary emails … to avoid using too many of your credits). If for some reason, we can not use the service (for instance because it is unresponsive or you no longer have CaptainVerify credits), then we won’t block the email collection and consider that the email is valid.
However, we’ll remember what addresses have actually been checked using CaptainVerify (and which ones have not).
In the “Collected data” section, you’ll have a “Verified email” colum with 2 status icons :
– A green checkmark if the email has been verified using CaptainVerify.
– A gray cross if the email has not been verified using CaptainVerify (either because you hadn’t added the verification step at this time or because you no longer had any CaptainVerify credits).
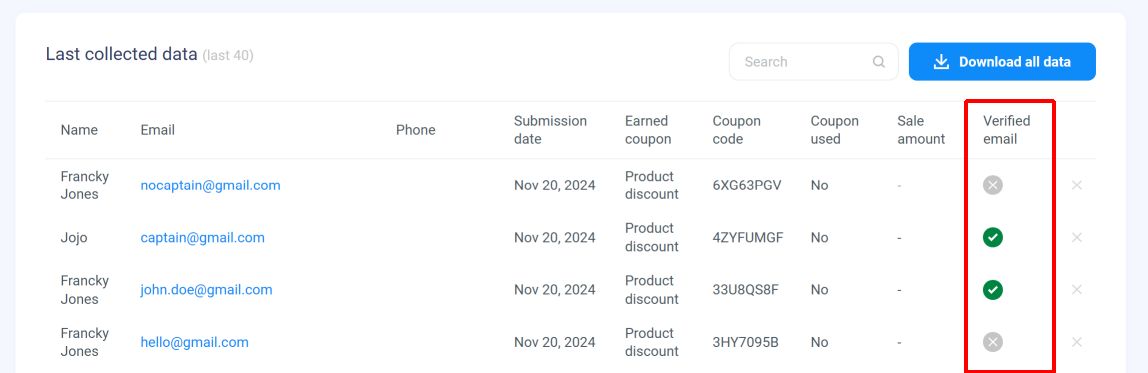
Of course, if CaptainVerify told us that an email address was invalid, it was not collected (and won’t be in the list above).
In addition to the “Verified email” data being available in this table (and in the downloadable CSV using “Download all data”), you can also send the information to your integrations.
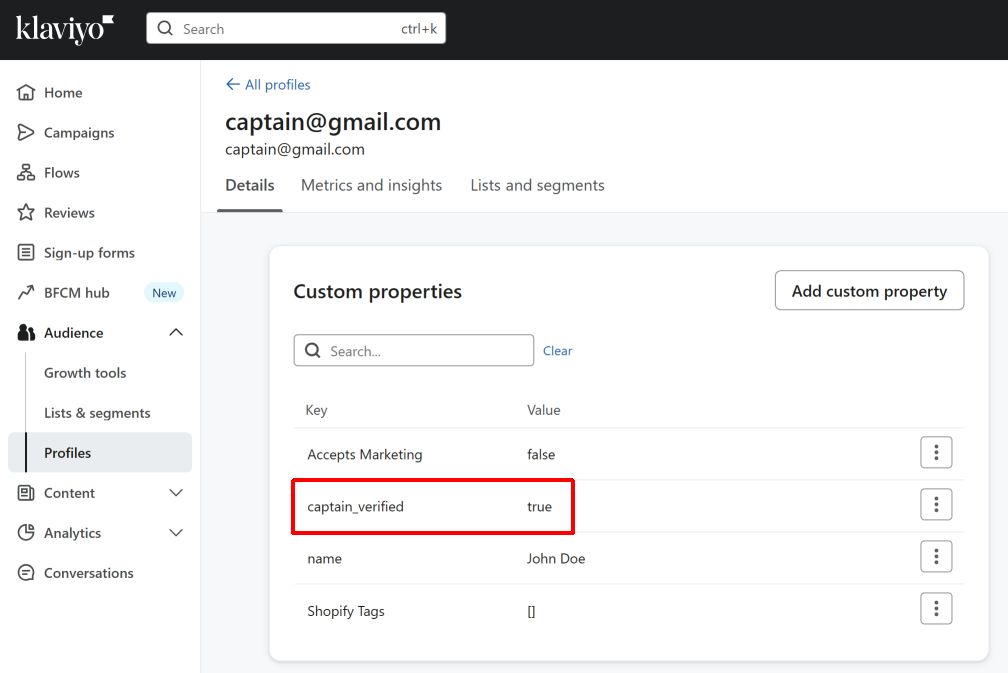
For instance, you can set up your Klaviyo integration so that the “Email verified” information is stored in a custom property like “captain_verified” for instance.
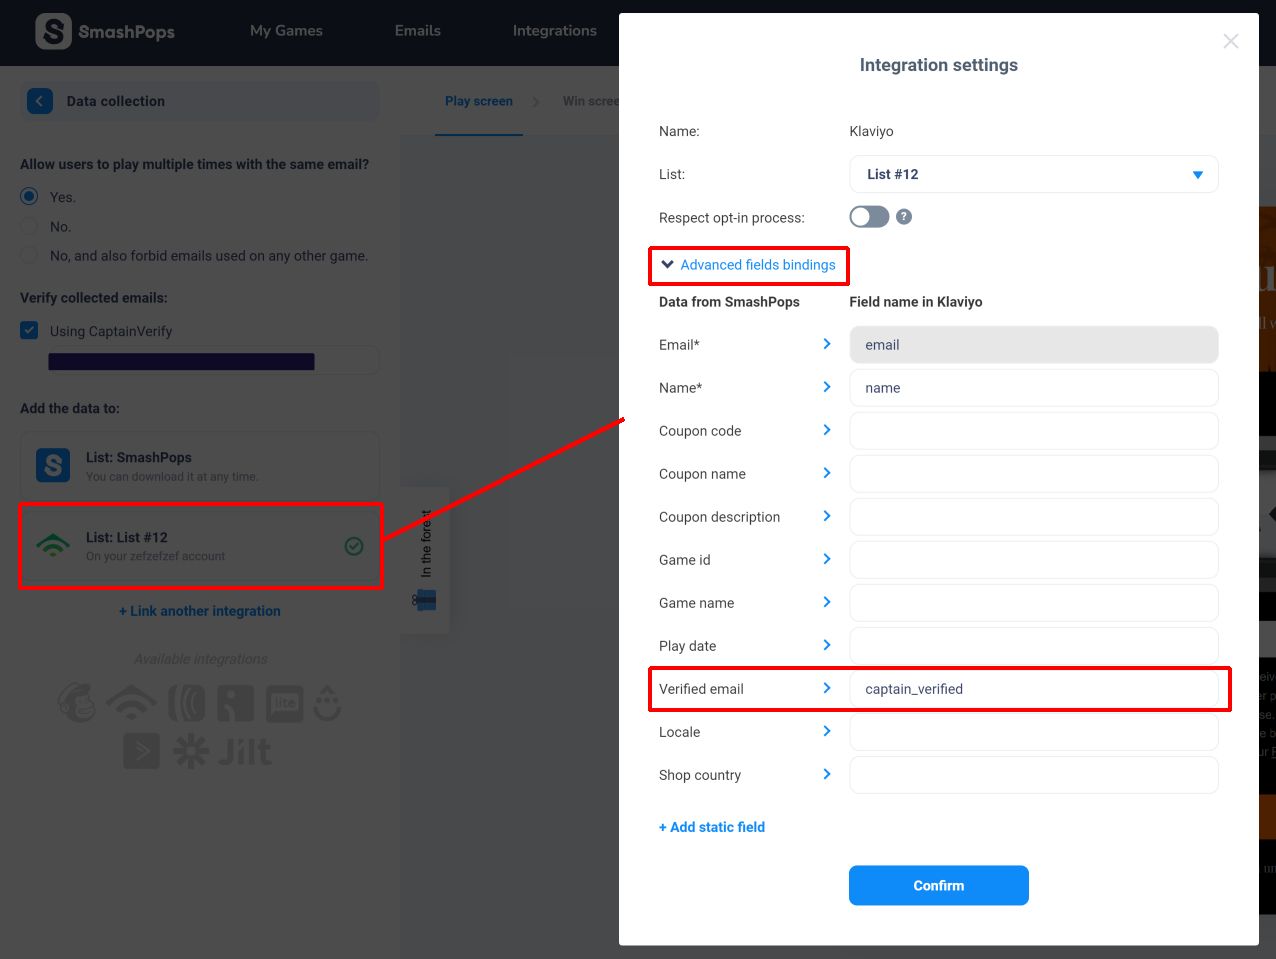
And then in the Klaviyo profile attached to the email that was collected by your popup, you’ll see that “captain_verified” is set to “true” (if the email was verified) or “false”.
That’s it!